Lab 5
Interrupts
For Lab 5, we were tasked with using interrupts to measure the speed of a motor from quadrature encoder readings. By reading quarature encoder pulses using the MCU, we can then process these pulses and the difference between them using interrupts to cacluate and display the speed of the motor in RPM.
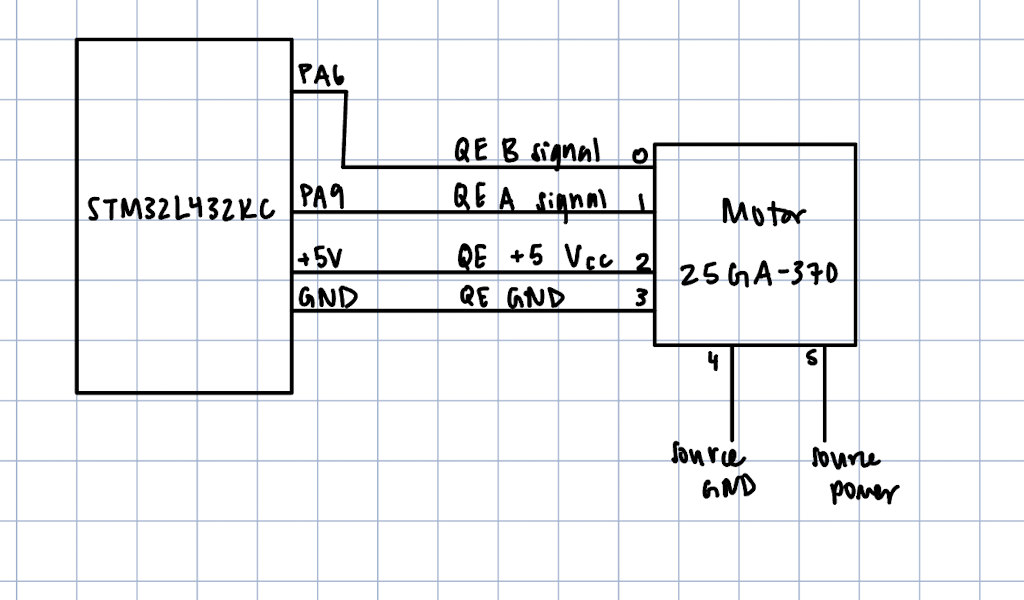
I used pins A6 and A9 to read the quadrature encoder pulses as both of these pins were 5V tolerant. The motor was powered by an external power supply. The figure below shows a schematic of the hardware setup.
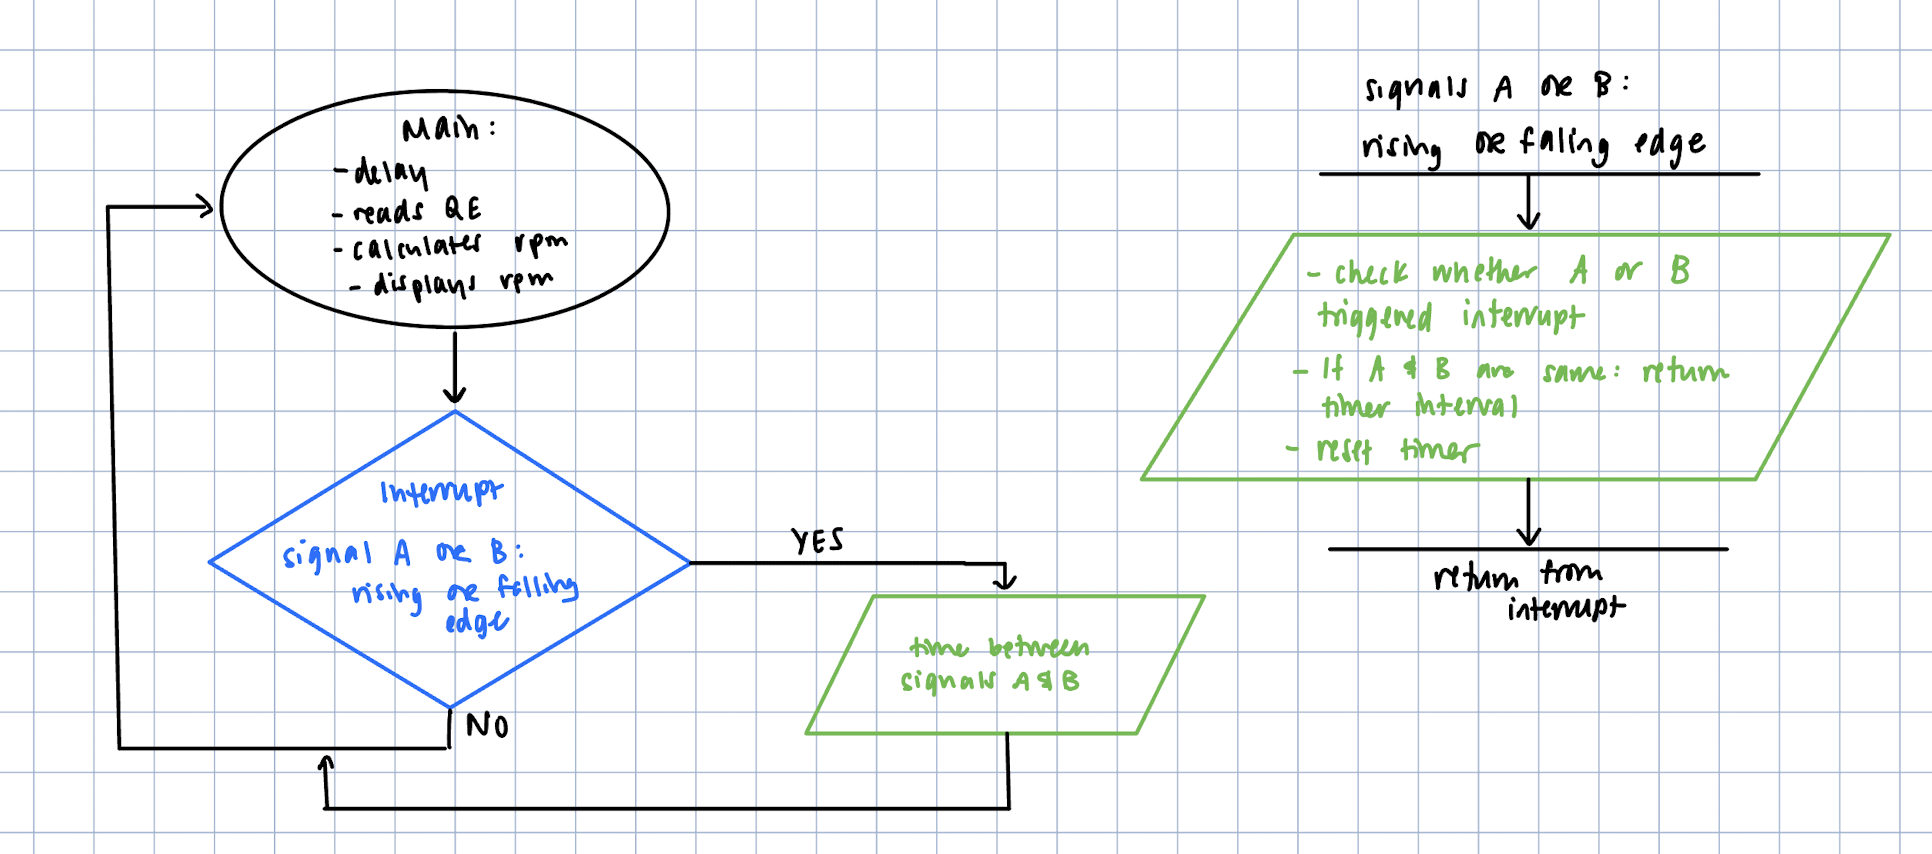
The use of interrupts is espeically handy for this application over manual polling (which checks if the GPIO pin input changes at every clock) at high speeds because it is faster at processing changes in input. Manual polling can often take too long to evaluate within the while loop, raising concern of missing signal changes. On the other hamd, interrupts allow for the MCU to immediately note when a signal is changed by noting a rising or falling edge, triggering a service routine. This process is shown in the flow chart below.
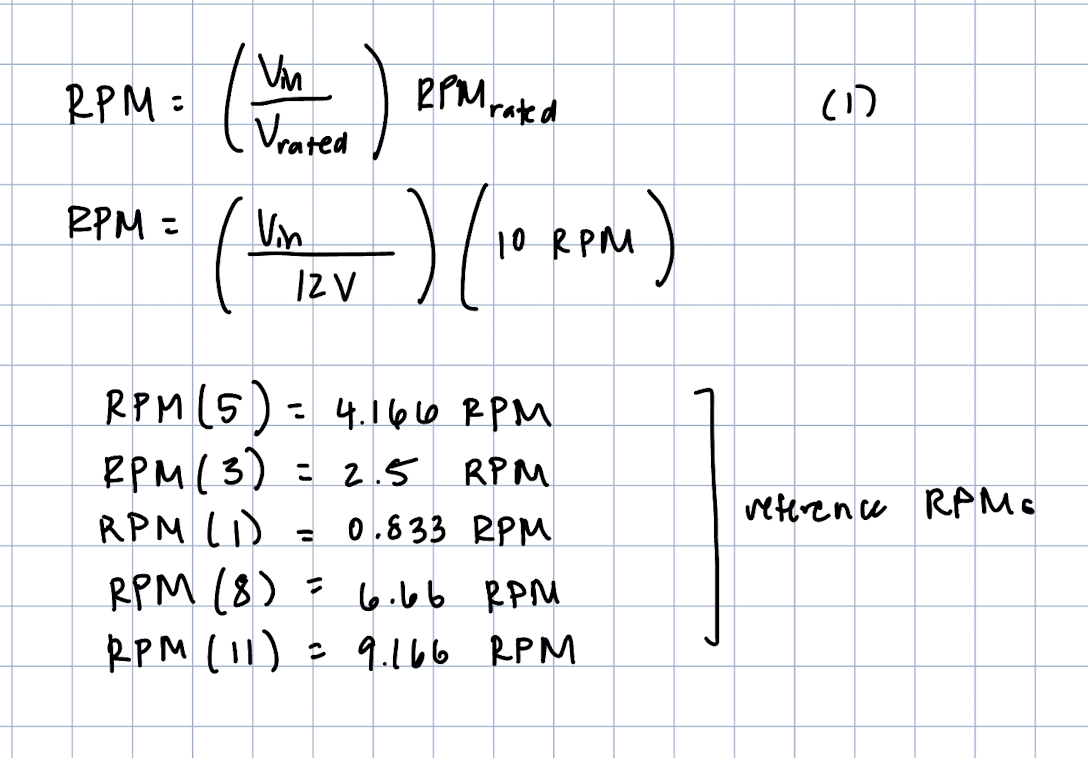
In order to confirm that the output voltages that were being displayed were reasonable, I used the following equation (1), which uses the rated voltage and RPM provided in the datasheet to essentially create a ratio of voltage to RPM. The following image also shows some sample reference RPMs that I used to verify that my measurements were accurate. Given that these are ideal calculations and there could be a lot of error associated with polling interrupts I allowed for error of ~0.3. The RPMs that are displayed in the debug cell are quite accurate to my hand calculated values.
Using the oscilliscope came in handy to first visualize the signals that were being outputted by the quadrature encoder and needed to be processed by the MCU interrupt setup. Overall, I thought most of my time on this lab were at first getting a good understanding of what I even needed to do - how the interrupts worked and why/how they were to be used for this use case was the most time consuming part for me. I found that the code itself followed in a relatively straightforward manner given the background and experience we got from last week’s Lab 4.
I spent a total of 10 hours on this lab.